Getting started
To enrich product attributes according to the ETIM standard, you need to have signed an ETIM agreement with Logiq Finfo. You will then gain access to the ETIM Tool, where you log in and enrich your products using an Excel file.

Login and Users
Once you’ve logged in, you’ll find several options in the menu on the left. You can export or import data for enrichment. If you need help, you can select Manual to return to this instruction, or choose Support to create an email to Finfo’s team responsible for ETIM.
Under your name, you can, for example, change your password or delete your account.

Create and Export
Click Export ETIM to generate an Excel file for enrichment. On the left side, you’ll see all ETIM classes for ETIM version 10. Here, you can choose to display only the classes currently in use or search across the entire model. After each class, you’ll see how many articles have been enriched.
To work with a class, simply click on it. The selected class will then appear on the right under Selected Classes. You can export up to five classes simultaneously, but we recommend working with one class at a time to simplify any troubleshooting.
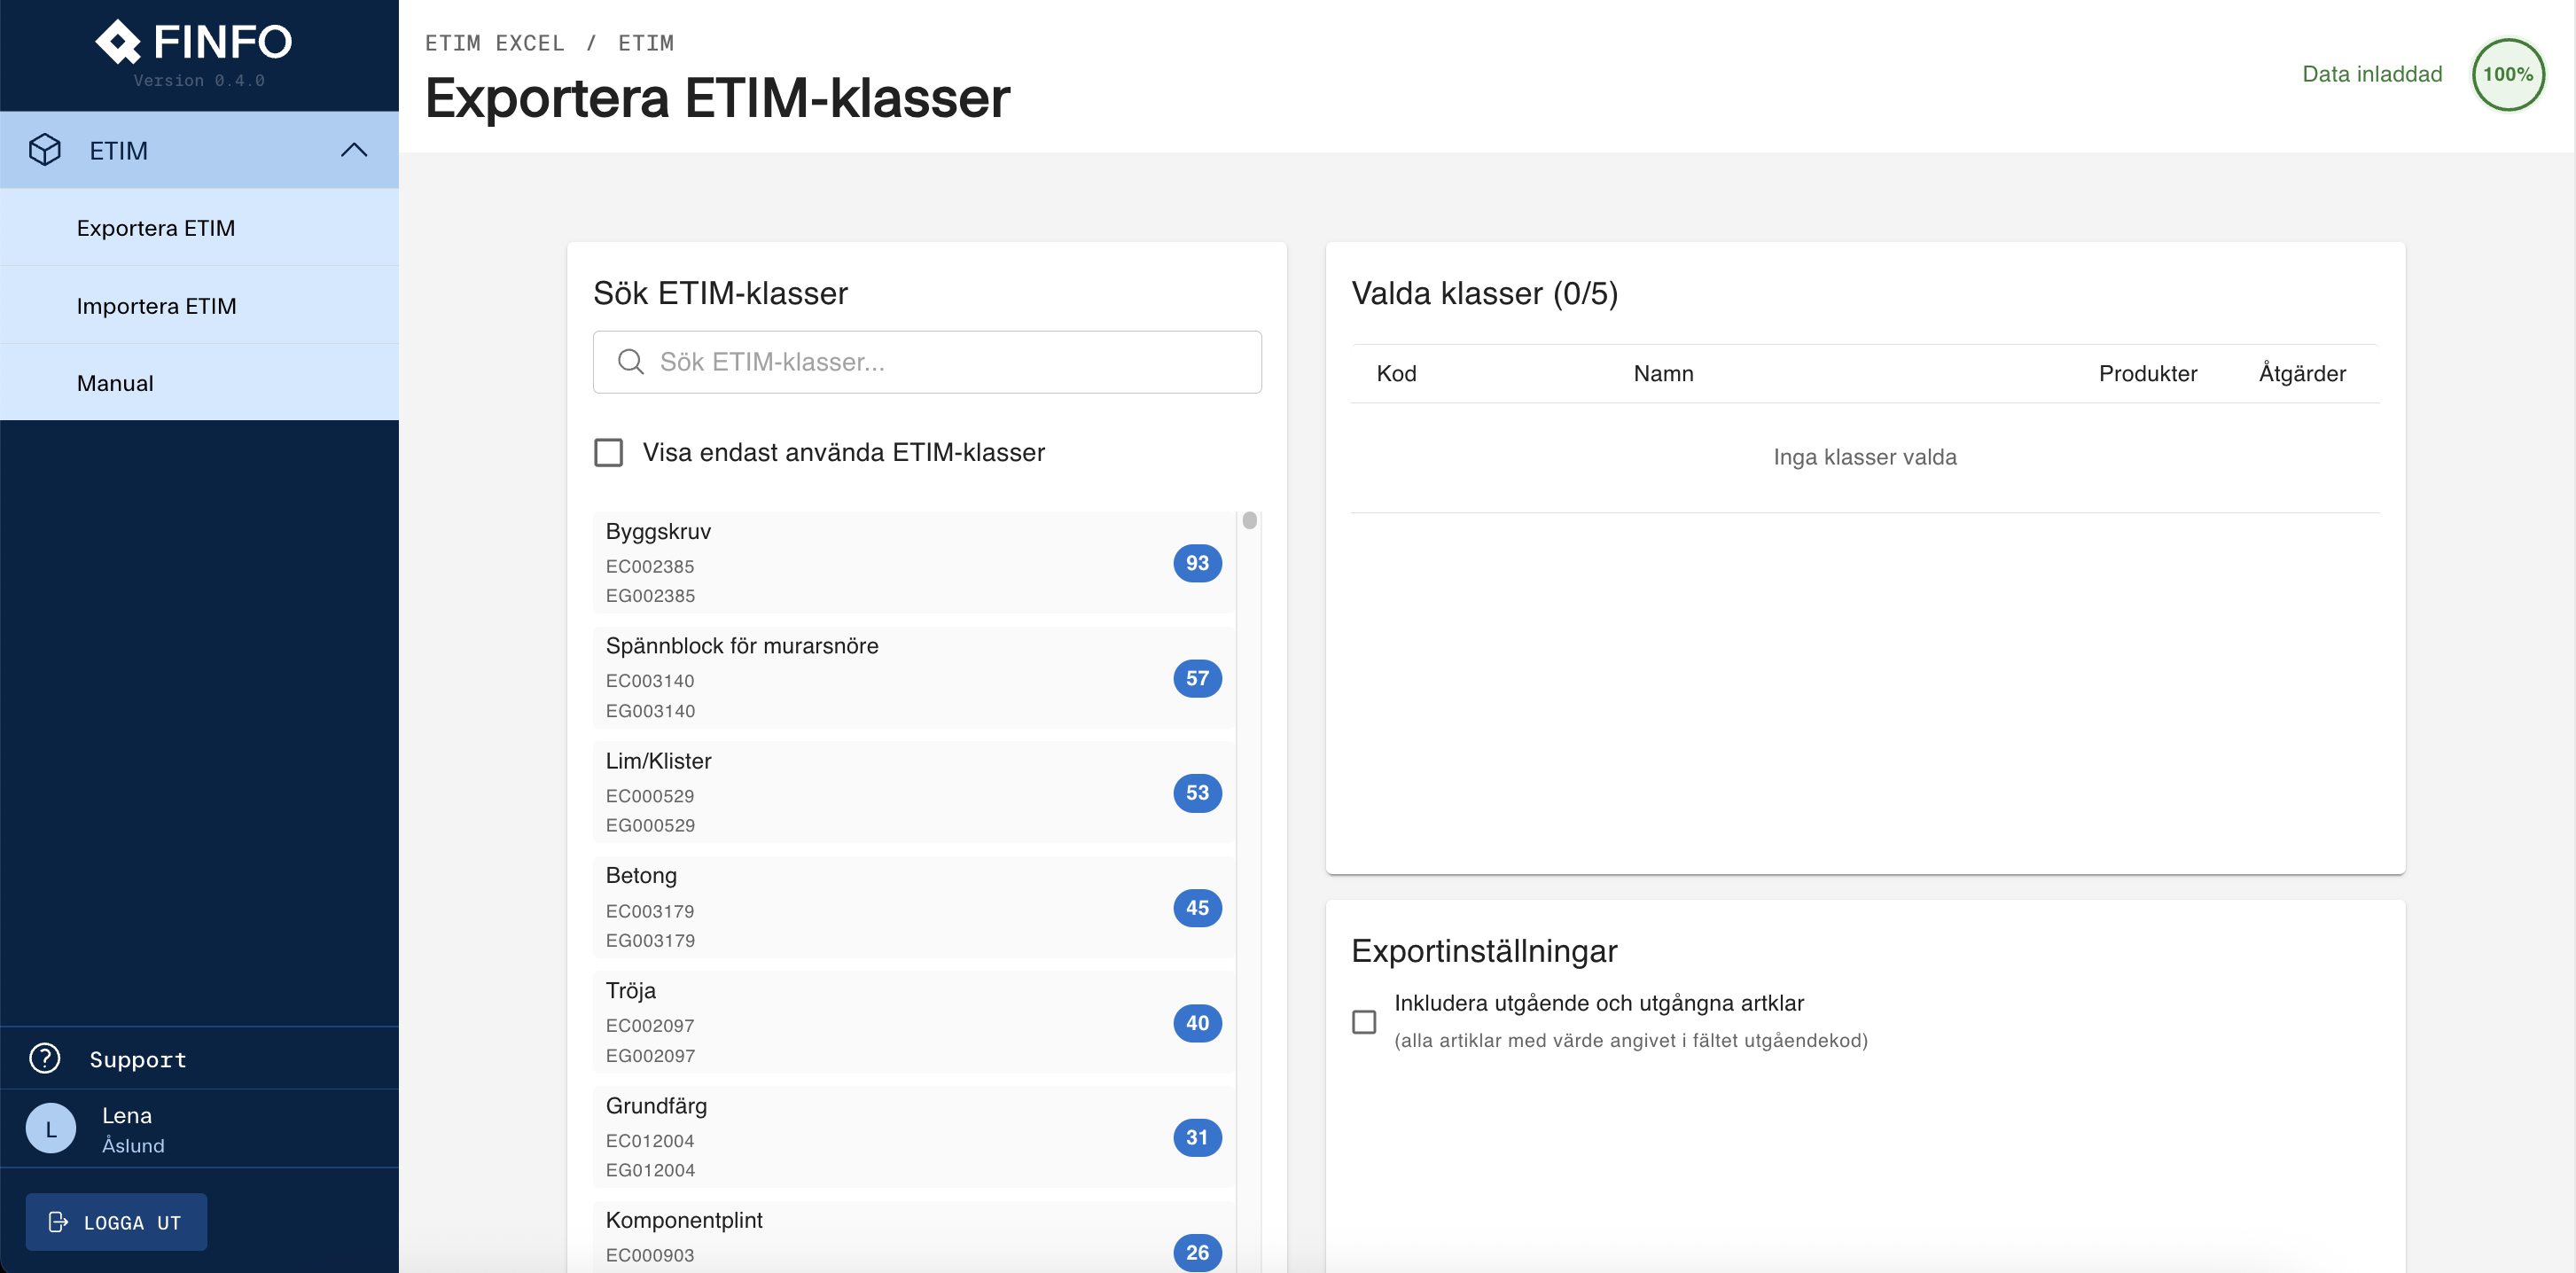
Before generating your Excel file, you need to choose if you want to include Expired and End of life articles in your export. By default, only active articles will be included.
Then Generate Excel File.
At the bottom of the page, you’ll find your previously exported files. These are stored for seven days.
Enrichment
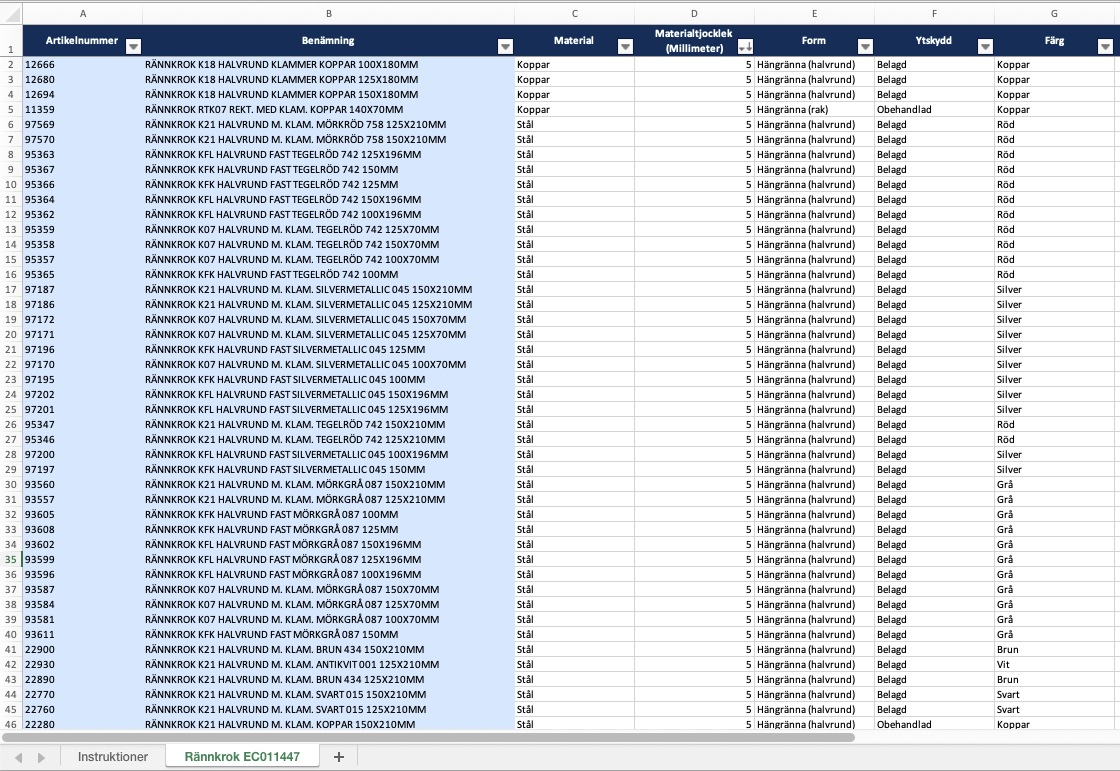
The file you generate always contains at least two tabs. The first tab includes a short instruction about the template, and the following tabs represent the classes you selected to work with.
To ensure correct import
-
Do not change the names in the headers, if you do, mapping will not work during import.
-
Do not change the sheet name, if you do, mapping will not work during import.
-
No columns may be removed. However, you may hide them if they are not relevant for your enrichment.
-
It is OK to delete a sheet containing an exported ETIM class if you do not want it to be imported. However, you cannot manually add your own sheets; they will not be read during import.
-
You can add articles directly in the correct sheet. The ETIM class will be updated after import, and you can start enriching immediately.
-
For numerical fields, use a comma (,) as the decimal separator.
-
You do not need to enrich all features, only those that are relevant for your products.
Once your enrichment is complete, save the file and return to the tool to import it.
Classifying an Article
It’s easy to classify an article using the export and import functions.
-
Search for and choose the correct ETIM class under Search ETIM Classes.
-
Export the file.
-
Enter the article number that should belong to the class. If the export already contains articles, add the article number at the bottom of column A.
-
Save the file and import it. The article is now classified.
Change the Class of an Article
-
Search for and choose the correct ETIM class under Search ETIM Classes.
-
Export the file.
-
Enter the article number that should belong to the class. If the export already contains articles, add the article number at the bottom of column A.
-
Save the file and import it. The article has now been reclassified.
Please note that any existing enrichment will be removed if the new class does not contain the same features.
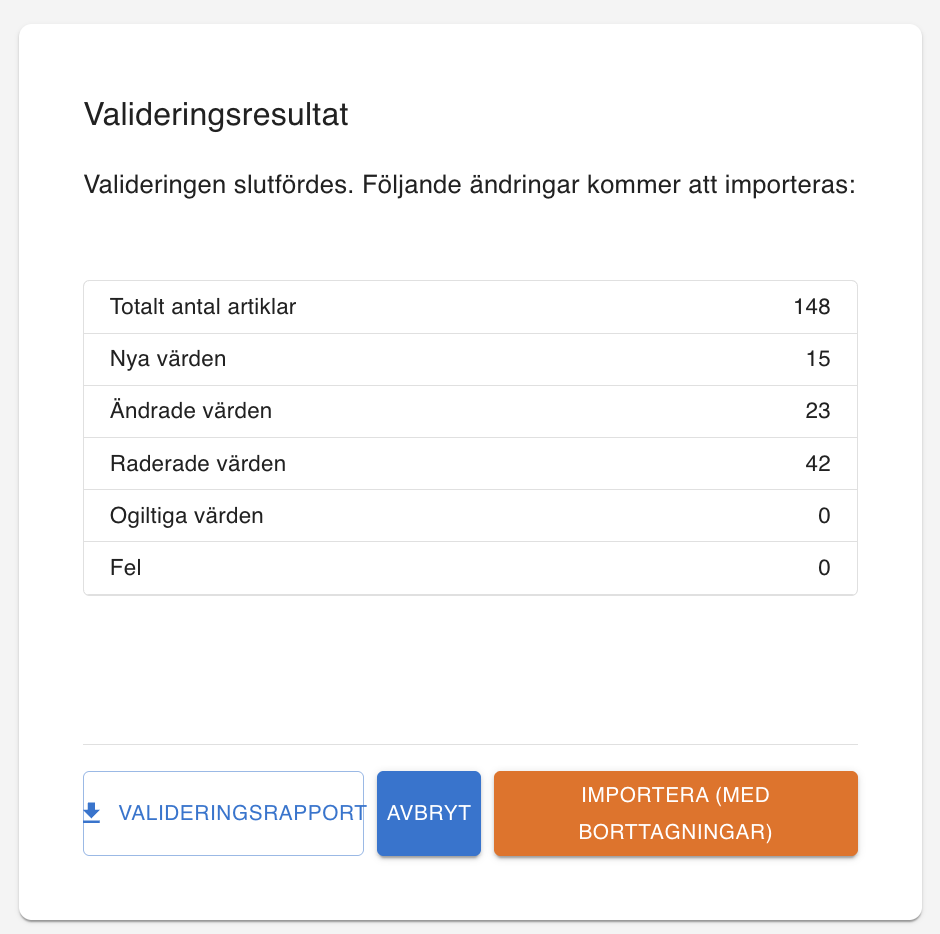
Import
Choose Import ETIM and upload your file by dragging it into the upload area or selecting it manually.
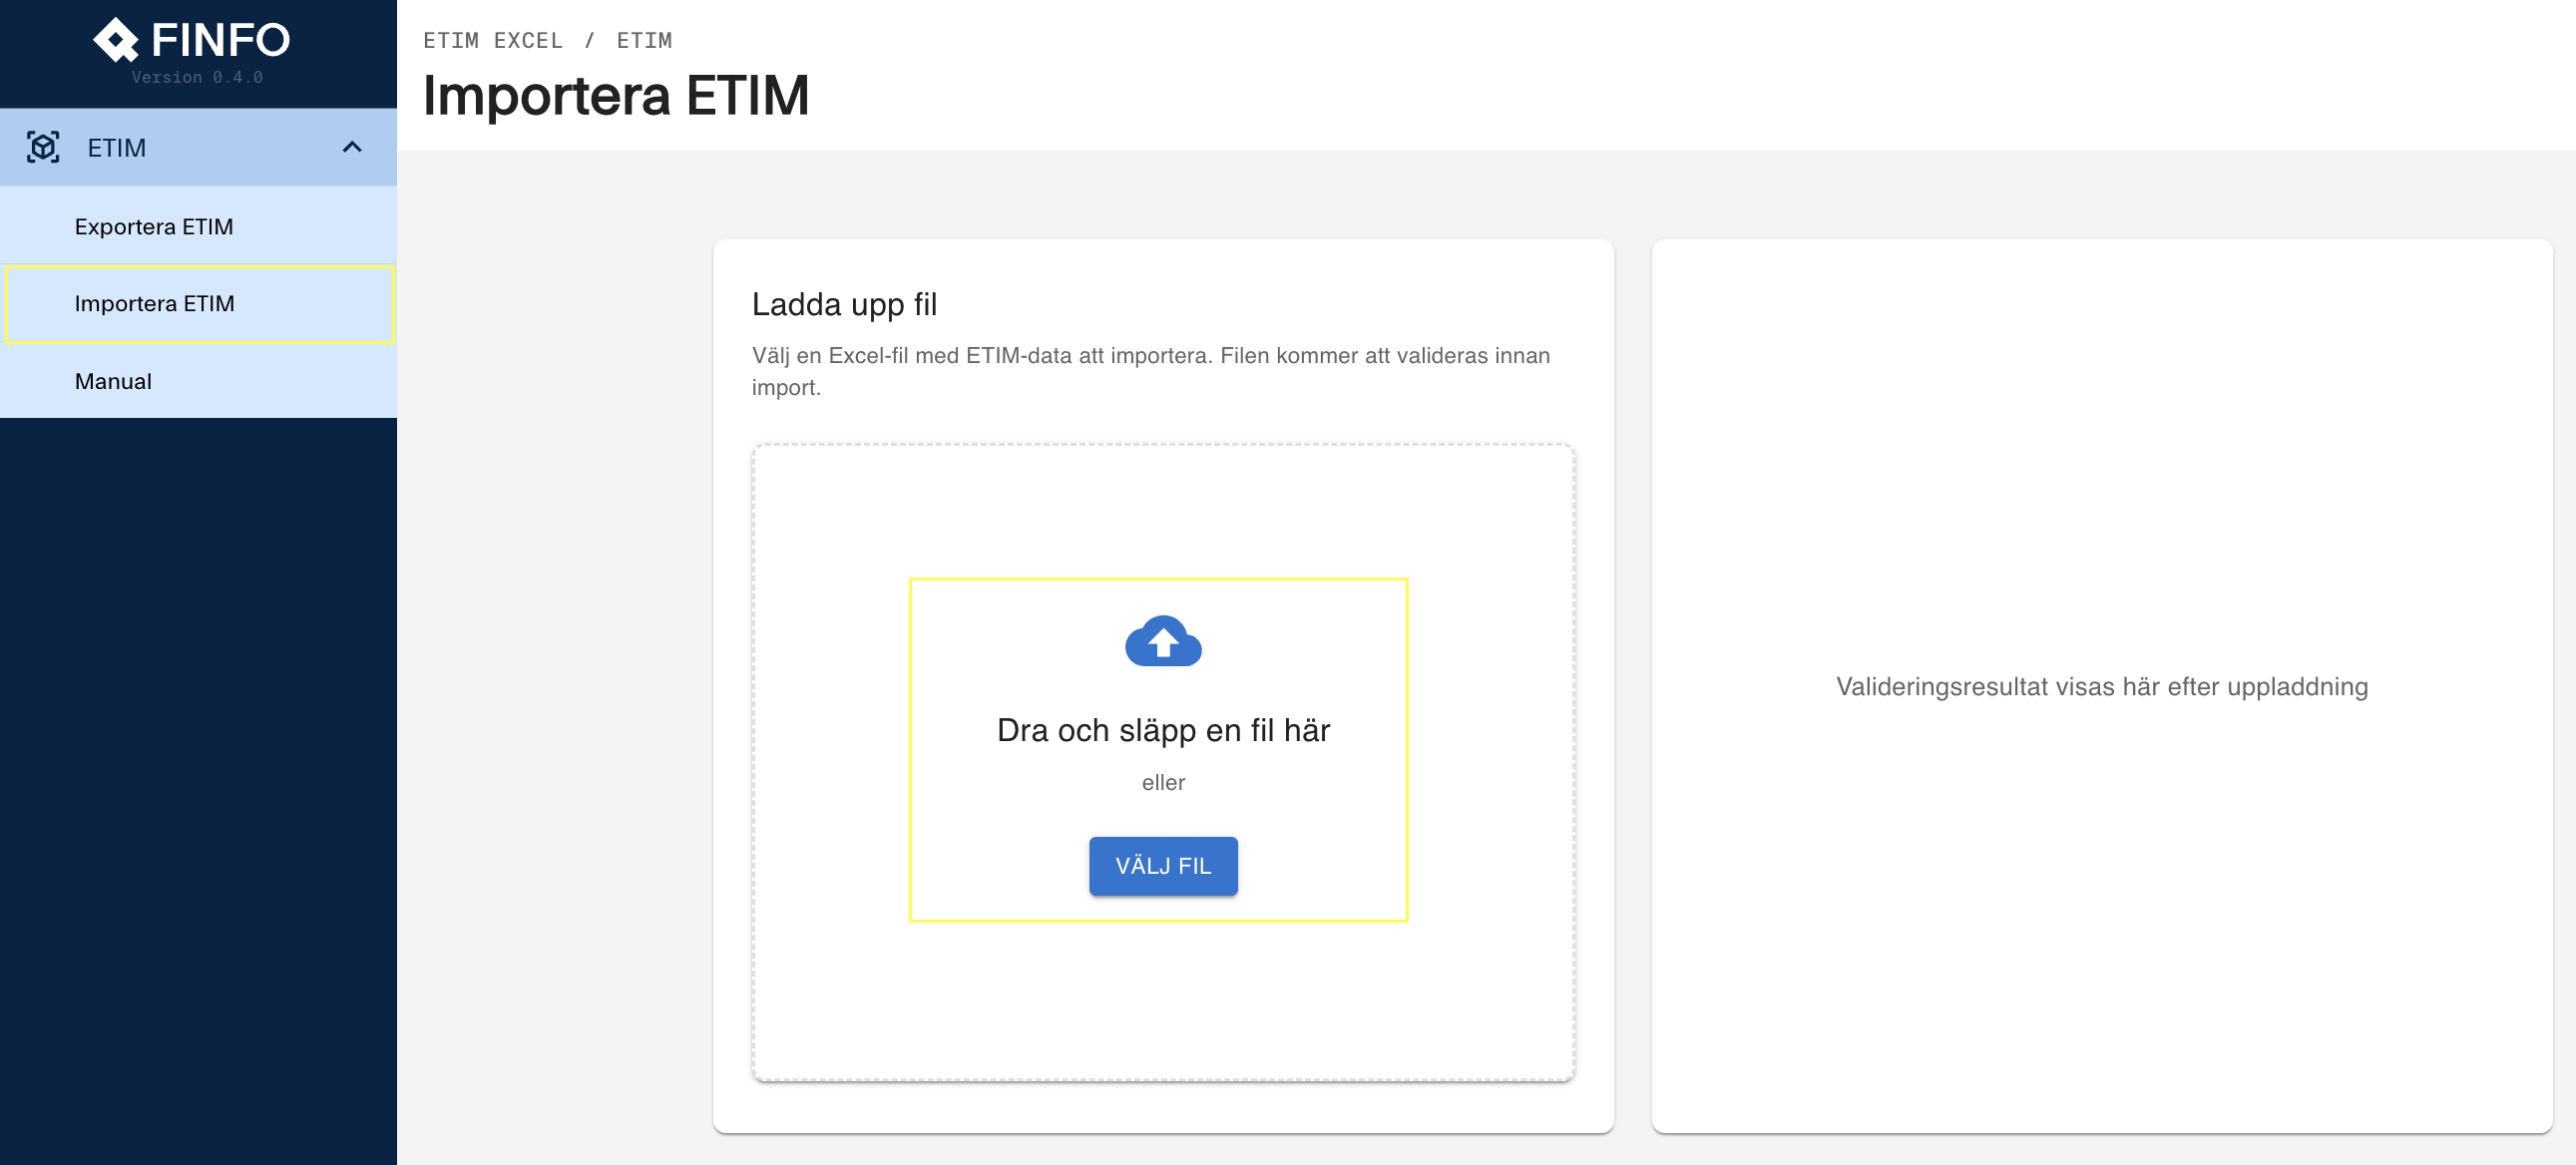
Then click Upload and Validate to start the validation process.

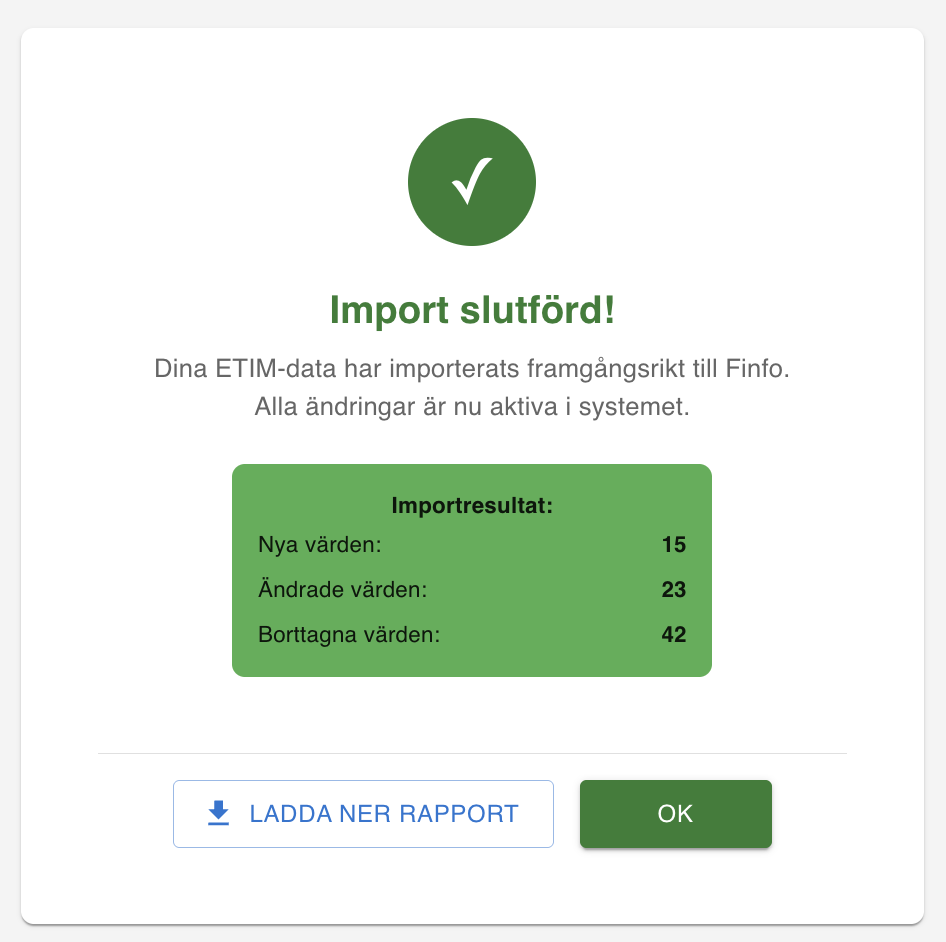
After the validation, the result is displayed immediately. If there are no errors or invalid values, you can click Import to update the database with your enrichment. You can also choose to first download the Validation Report to review the changes you’ve made before importing.
The Validation Report displays the changes per article number and is color-coded as follows.
|
Dark green |
New value (the field was previously not enriched.) |
|
Light green |
Changed value (the field was previously enriched with a different value.) |
|
Pink |
Deleted value (the information in the field has been removed.) |
|
Orange |
Invalid value (the value doesn't exist in the ETIM model and will not be imported.) |
|
Red |
Error or unavailable articles (see the comment in the validation file.) |

Invalid values and errors should be corrected in the export file. Then upload it again and perform a new validation. Once the validation is successful, you can proceed with the import.
Note: Validation does not write anything to the database, you must import the file for your changes to take effect.