
The Table View in Finfo One is a tool designed to help you work efficiently with article information in a clear and structured format. The view functions as an Excel-like interface directly within the system, allowing you to quickly get an overview of large amounts of data and work with multiple articles at the same time.
In the Table View, you can filter and analyze information based on all available fields, making it easier to find the right selection and identify articles that need updates. One of the main advantages is the ability to perform bulk updates, which saves time and reduces the need to handle articles one by one.
Since changes are made in real time, you are always working with the most up-to-date information. The Table View therefore provides effective support for overview, quality assurance, and management of article data in Finfo One.
In the following sections, we will go through how the Table View works in practice and which functions are available.
Open and switch between views
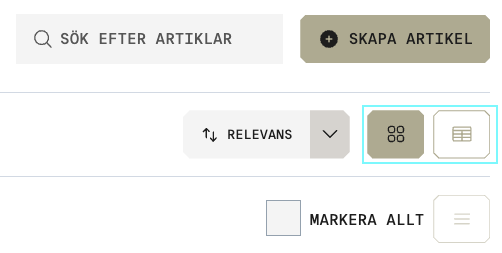
Go to Articles in the left-hand menu. In the top right corner, you will find two view buttons:
-
The table icon opens the Table View, where you can work in a structured way with multiple articles at the same time. Choose the Table View when you want to filter, analyze, or update several articles simultaneously.
-
The four-square icon opens the Article View, where you see the front page of each article card. Choose the Article View when you want to work more in detail with an individual article.
Customize the layout in Table View
In the Table View, you can choose which fields to display and edit by selecting them in the menu on the right. All fields available in the platform can be selected, and there is no limit to how many fields you can add.
However, to maintain a clear overview, it is recommended to work with a smaller number of fields at a time, especially when working with large selections of articles.
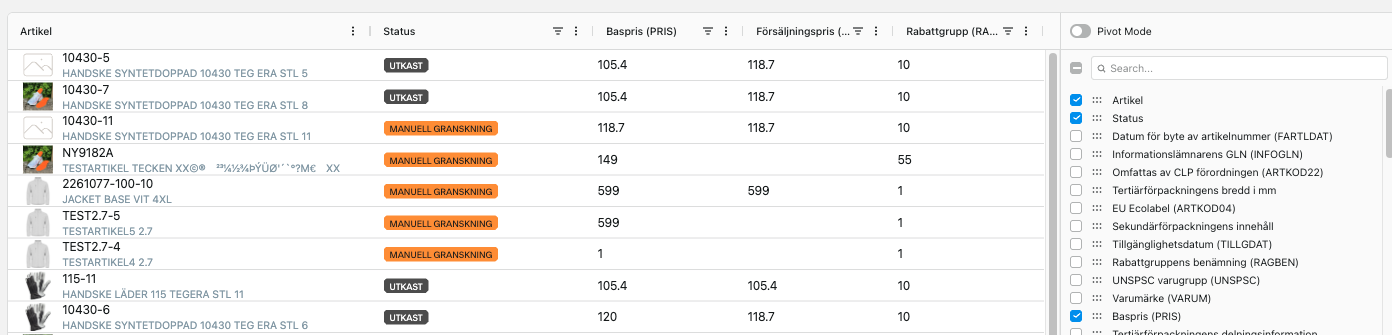
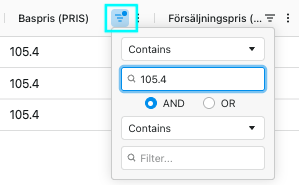
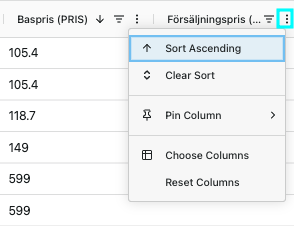
Once you have selected which fields to display, you can further sort and filter the information, just like in Excel. To do this, click the icons in the header row next to each field name.
Edit directly in Table View
All fields in the Table View can be edited directly in the interface. Note that fields are saved automatically.
To change a value, double-click the field and enter the new information. You can also copy (Ctrl+c) a value from one field and paste (Ctrl+v) it into another field.
To undo entered data, the following keyboard shortcuts can be used: Undo (Ctrl+z) and Redo (Ctrl+Shift+z).
As in Excel, you can also copy a value to multiple rows by dragging the lower-right corner of the cell downward.
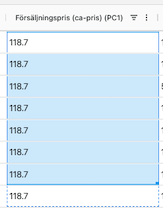
Be careful when double-clicking the lower-right corner of a cell. Doing so will automatically copy the value and overwrite all rows below it in that column.
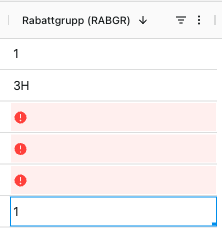
Fields with errors or missing values
Fields that contain an invalid value or where information is missing are highlighted in red. This allows you to quickly identify what needs to be completed, especially in required fields.
Tips for working efficiently in Table View
Work with clear selections
Start by filtering a relevant selection, for example articles with a specific status, a certain article class, or articles with missing values. This helps you stay focused and reduces the risk of updating the wrong articles.
Perform larger updates at a suitable time
If you plan to perform bulk updates, it can be helpful to first ensure that your selection is correct and then apply the changes in one step.
Use the red highlights actively
Red highlighted fields help you quickly identify errors or missing required information. By filtering on these fields, you can work systematically with quality assurance.
Work directly in the system instead of exporting
By working directly in Finfo One, the information is updated in real time, giving you full control over the changes. You also avoid handling file exports and imports, as well as the risk of working with outdated versions.